

Introduction
In this tutorial, we will learn how to create a simple Python Flask API. Flask is a micro web framework written in Python that allows you to build web applications easily. It is lightweight, flexible, and easy to use, making it a popular choice for developing APIs.
Before we dive into creating our Flask API, let’s take a moment to understand what an API is and why it is important. An API, or Application Programming Interface, is a set of rules and protocols that allows different software applications to communicate with each other. It defines how different components of a software system should interact with each other, enabling seamless data exchange and integration.
APIs play a crucial role in modern software development as they allow developers to build applications that can interact with other systems, services, or platforms. They enable the exchange of data and functionality between different applications, making it possible to create complex and interconnected software ecosystems.
Flask, being a web framework, allows us to build APIs that can be accessed over the internet. This means that we can expose certain functions or resources of our application to other systems or developers, allowing them to interact with our application programmatically.
In this tutorial, we will be building a simple Flask API that will serve as a backend for a blog application. The API will allow users to create, read, update, and delete blog posts. We will cover the basic concepts and techniques required to build a fully functional API, including routing, request handling, and database integration.
By the end of this tutorial, you will have a good understanding of how to create a Flask API and how to implement common API functionalities. You will be able to apply this knowledge to build your own APIs for various purposes, such as mobile app backends, data integration, or web service development.
Prerequisites
Before we begin, make sure you have the following:
- Python (3.6 or higher)
Step 1: Create Project Directory and Navigate
Open your terminal or command prompt and execute the following commands:
mkdir flask_project
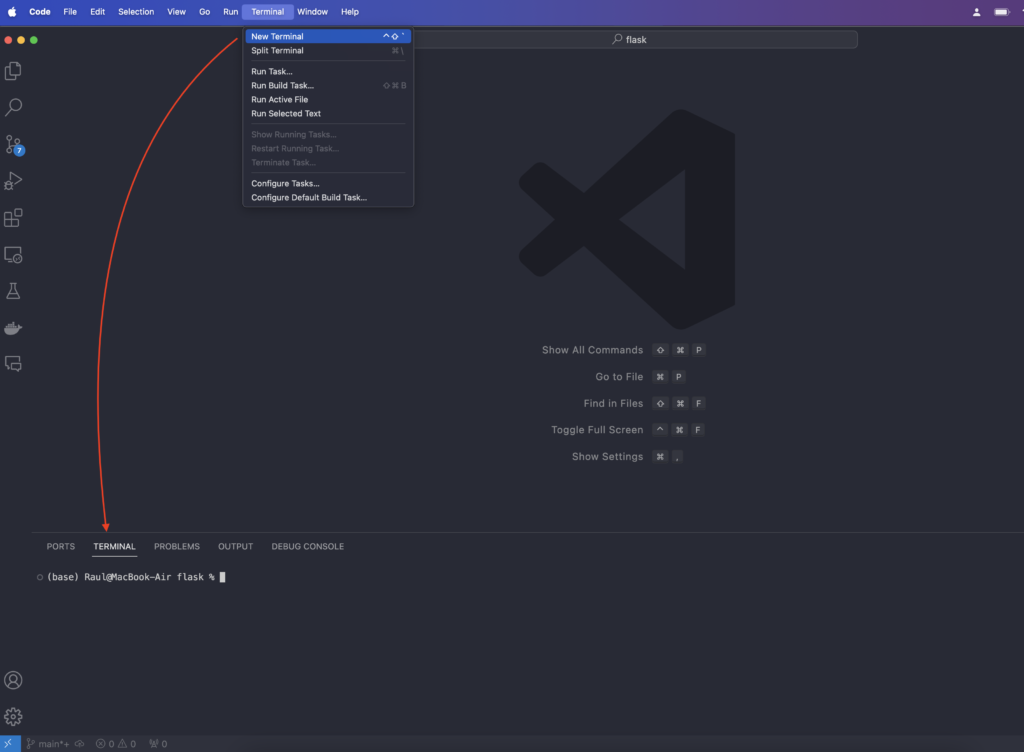
cd flask_projectOpen project in VS Code with the following command:
code .Open VS Code terminal:
Step 2: Create Virtual Environment:
In your terminal or command prompt execute the following commands:
python3 -m venv venvStep 3: Activate Virtual Environment:
- On Windows:
venv\Scripts\activate- On macOS/Linux:
source venv/bin/activateStep 4: Install Flask:
Once your virtual environment is activated, you can install Flask:
pip install FlaskStep 5: Create Python Files
Inside the flask_project directory, create three Python files: main.py, user.py, and car.py.
touch main.py user.py car.pyStep 6: Creating User and Car Classes
Inside user.py, add the following code:
class User:
    def __init__(self, id, name, age): # This is the constructor of the class
        self.id = id
        self.name = name
        self.age = age

############################################
# Define list of users outside the class
# This is simulating a database
# To create a object, you need to call the class and pass the arguments to the constructor, in this case the constructor requires 3 arguments
# id, name and age. That's the __init__ method in the class User that will initialize the object with the values passed to the constructor
############################################
users = [
    User(1, "John", 30),
    User(2, "Jane", 25),
    User(3, "Robert", 35),
    User(4, "Tom", 40),
    User(5, "Jim", 45)
]

User.users = users # Assign the list of users to the class attribute
Inside car.py, you can create the Car class similarly, but we’ll leave it as a TODO for you to complete.
# TODO: create a class called Car. The Car class should have the following attributes:
# - make
# - model
# - year

# Define a list of cars outside the class
# The list should contain 5 Car objects

# Assign the list of cars to the class attribute

# You can use User class as a reference
Step 5: Creating the Flask App
Now, let’s move on to main.py and create our Flask app.
from flask import Flask, jsonify
from user import User
# Import the Car class from car.py

app = Flask(__name__) # Create a Flask app

@app.route("/users")
def users():
    users = User.users # Get the list of users

    return jsonify([user.__dict__ for user in users]) # Return the list of users as JSON
    # The __dict__ attribute returns the dictionary of the object

# TODO: Create a route that returns the list of cars
# The route should be "/cars"


if __name__ == '__main__':
   app.run(host="localhost", port=8000, debug=True) # Run the app on localhost:8000 with debug mode enabled
Testing the API
To test the API, run the main.py script by executing python main.py in your terminal.
python main.pyYou should see output indicating that the server is running.
Now, open your web browser or a tool like Postman and navigate to http://localhost:8000/users. You should see a JSON response containing information about the users.
Conclusion
Congratulations! You’ve successfully created a simple Python Flask API. Flask provides a flexible platform for building web applications and APIs, and this tutorial only scratches the surface of its capabilities. Experiment further, add more routes, and explore Flask’s extensive documentation to unlock its full potential. Happy coding!
Source Code:
GitHub: https://github.com/jimenezraul/How-to-Create-a-Simple-Python-Flask-API